PART 1: Creating Global Options or “Attributes”
1. Set up a Size attribute in WooCommerce – Products > Attributes – you will add the “name” of the attribute, not the individual options. So, For example, “Size”.
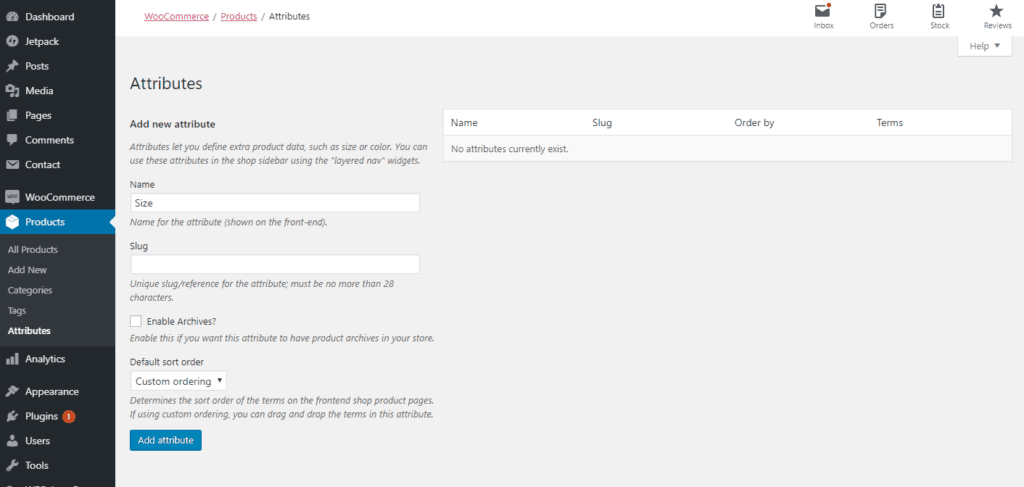
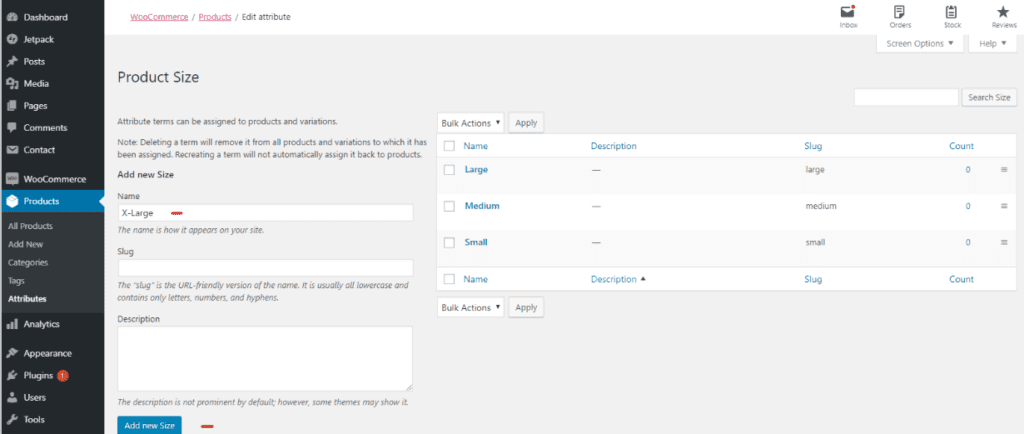
2. Now that you have added Size, lets configure the terms. This is where you will add the terms such as Small, Medium, Large etc. Click on Configure terms at the far right of “Size”

3. Add your Sizes one at at time under Add New Size. Only the Name field is required.
Part 2: Adding the Options from Part 1 to Any Product
1. Select a product to edit in the control panel.
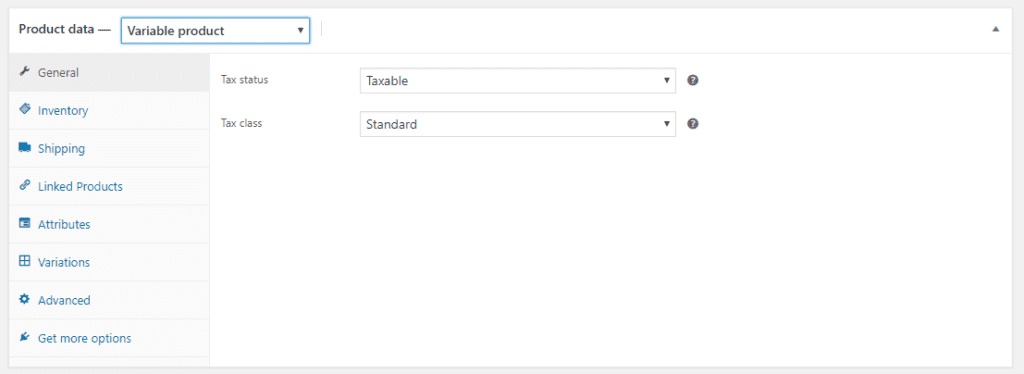
2. Find the Product Data box and Switch your Product to “Variable Product”
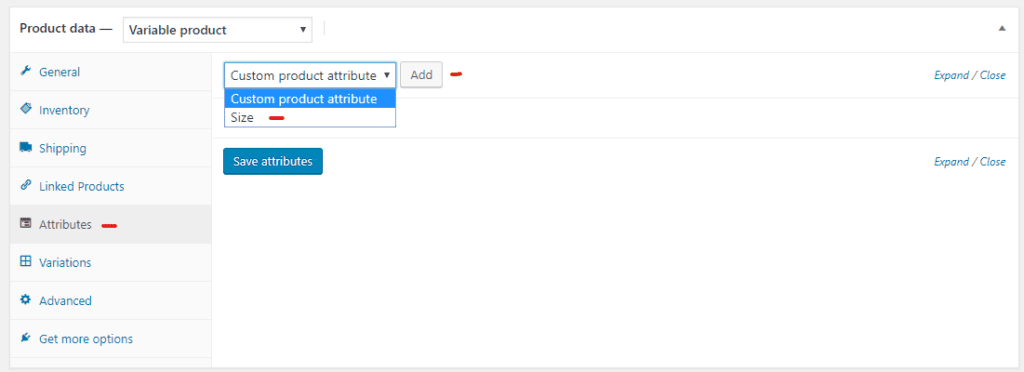
3. Click on “Attributes” tab and Add “Size”
4. Click on Size to expand the menu and add your small medium and large values. (see image below)
5. Check “Visible on the Product Page” and “Used for variations” (see image below)
6. Click save attributes button

7. Select the “Variations” Tab and click “Create Variations from All Attributes” This will create a variation for each attribute you added above.
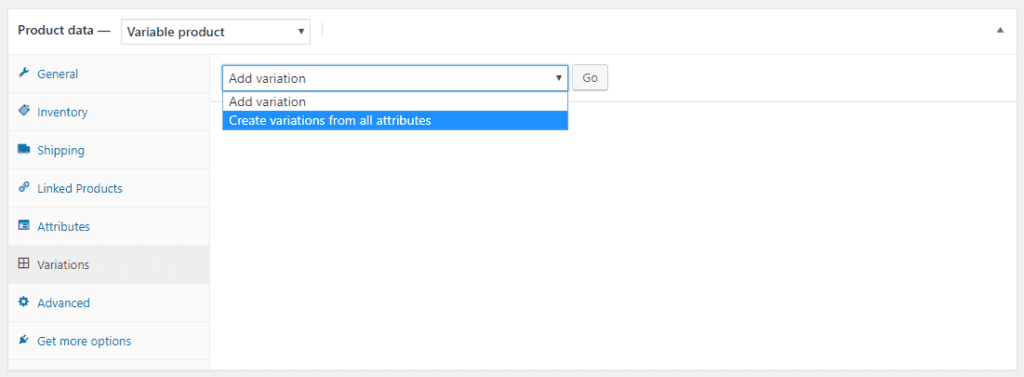
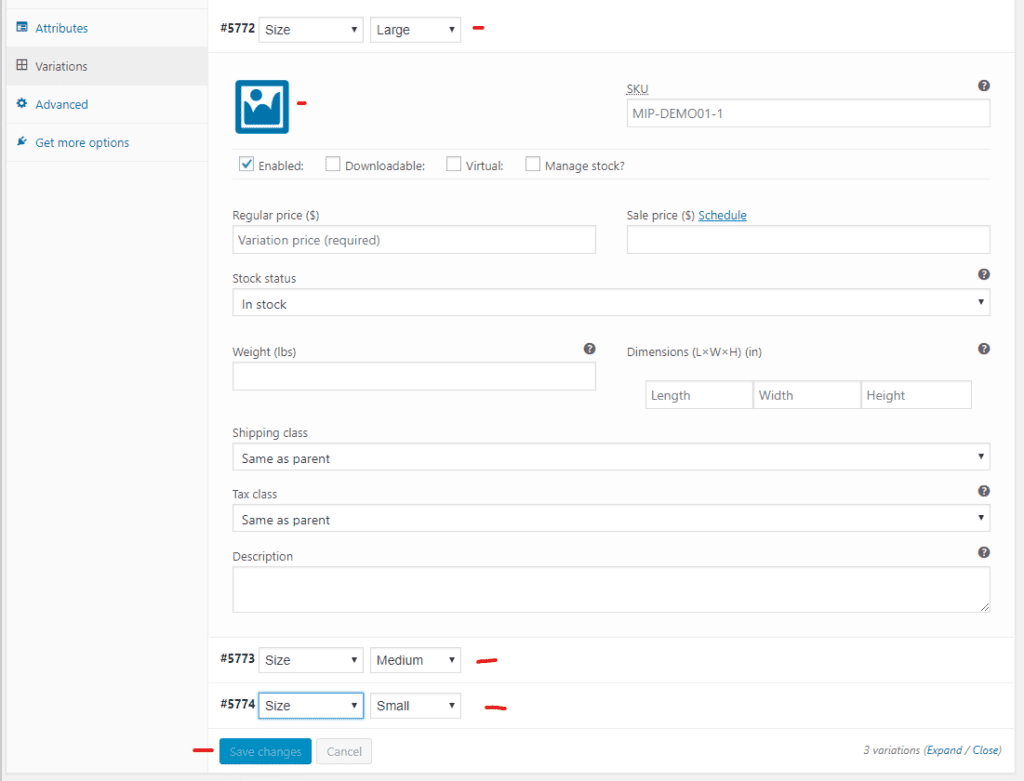
8. You can now click each variation to expand the options for each one. You can add separate pricing, sizing, images and descriptions for each variation.
9. Click the save Changes button at the bottom of the variations tab.
10. Click the Update or Publish button in your WordPress Publish box.


